Understanding Contouring: The Basics
Contouring is a makeup technique utilized to enhance and define facial features, creating the illusion of more sculpted cheekbones, a slimmer nose, and an elongated jawline. Within the realm of makeup artistry, contouring effectively emphasizes the natural structure of the face through the strategic application of matte and shimmer products. By manipulating light and shadow, makeup artists can highlight specific areas while creating depth in others, leading to a more polished appearance.
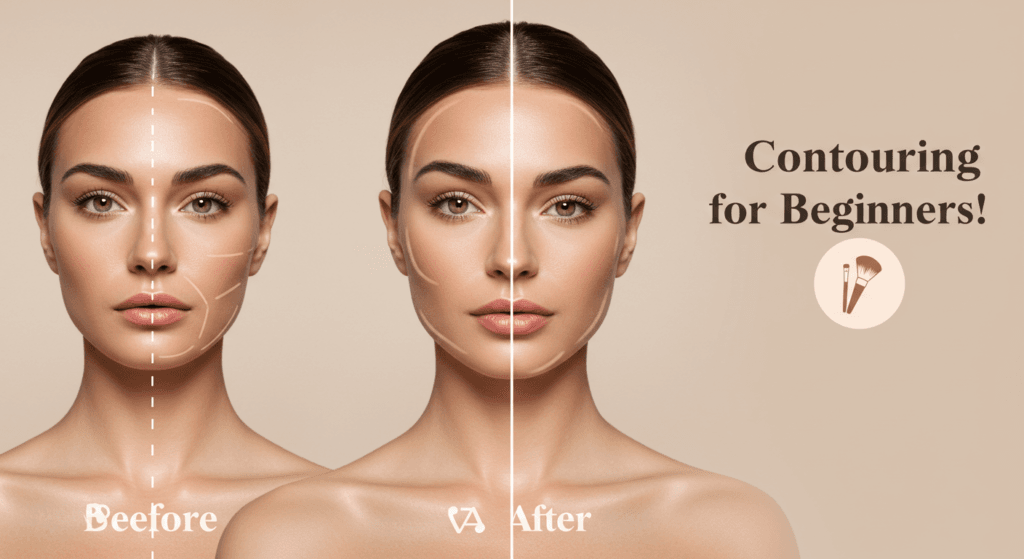
The core of contouring lies in its dual approach: highlighting and shading. Highlighters draw attention to areas where light naturally hits the face, such as the tops of the cheeks, the bridge of the nose, and the cupid’s bow. Conversely, contour products are used to add shadows to areas that one wishes to recede, like the hollows of the cheeks or along the sides of the nose. For beginners, understanding this balance is essential as it serves as the foundation for a successful face contour tutorial.
Beyond the aesthetic enhancements, contouring carries psychological effects that can impact an individual’s confidence and self-perception. Many novices discover that even subtle contouring techniques can significantly enhance their natural beauty, leading to a more confident self-image. Additionally, easy contouring methods can result in refined looks without the need for proficiency in advanced makeup skills, making it accessible for anyone eager to learn.
For those just diving into contouring, it is crucial to familiarize oneself with the best contour products tailored to one’s skin type and tone. This foundational knowledge prepares beginners for a makeup contouring step-by-step process that can be refined over time. By combining practical techniques with an understanding of contouring tips for beginners, individuals can master this essential makeup skill for everyday wear or special occasions.
Choosing the Right Contouring Products
When embarking on the journey of makeup contouring, selecting the right products is critical for achieving a natural and flattering look. There are various types of contouring products available, which can make the process overwhelming for beginners. The most common formulations include creams, powders, and sticks, each offering unique advantages depending on skin type and desired finish.
Cream contour products are ideal for those with dry skin, as they provide a dewy finish that blends seamlessly. They are typically easy to work with, making them a popular choice among new users. For individuals with oily or combination skin, powder contours might be the best option. Powders offer a matte finish and help to absorb oil throughout the day, ensuring the contouring remains intact. Stick formulations provide convenience and portability, often combining both cream and powder finishes. They are perfect for quick touch-ups and can be blended easily with fingers or a brush.
Choosing contour products that cater to your skin tone is equally important. Beginners should gravitate towards shades that mimic natural shadows on their face—cool tones like taupe or ash are ideal for fair skin, while warmer brown shades work better on medium to deep complexions. Additionally, products labeled as “beginner-friendly” can reduce the learning curve, as these often have more forgiving formulations and are easier to blend. Brands such as e.l.f, NYX, and Maybelline offer quality products at accessible price points, making them great options for those just starting out.
In essence, selecting the right contouring products involves considering your skin type, tone, and desired finish. With the appropriate tools in hand, executing an effective face contour tutorial becomes much more attainable, laying the groundwork for mastering makeup contouring step by step.
Essential Tools for Contouring
To achieve a well-defined and sculpted look, it is crucial to have the right tools for contouring. A variety of brushes, sponges, and applicators can enhance your makeup application process, leading to a flawless finish. Every makeup contouring step requires specific tools tailored to their unique purposes, making it essential to build a collection of the best contour products for beginners and experienced users alike.
First and foremost, foundation brushes and stippling brushes are essential for applying contour products smoothly and evenly. A flat foundation brush helps to seamlessly blend your contour and highlight shades. In contrast, a stippling brush allows for buildable coverage and a natural, airbrushed look. For those who prefer a more targeted application, a small and tapered brush can precisely place product in areas that require definition, such as the jawline and cheekbones.
Sponge applicators are another vital tool in the contour makeup guide. A damp beauty sponge can provide an excellent finish by bouncing the product onto the skin, ensuring it blends effortlessly. This technique is particularly effective when using cream-based contours, as the sponge helps melt the product into the skin for a more natural effect. Additionally, makeup artists often recommend having an array of sizes and shapes to accommodate different contour applications.
Proper cleaning and maintenance of your tools is equally important. Regularly disinfecting brushes and sponges ensures that they remain free from bacteria, which can cause skin irritation. It is advisable to wash your brushes weekly using mild soap or a specialized brush cleaner, while sponges should be cleaned after every use. By taking good care of these essential tools, you can prolong their lifespan and guarantee that they consistently contribute to your makeup contouring step by step.
Step-by-Step Contouring Technique
Contouring for beginners can seem daunting, but with the right face contour tutorial, anyone can achieve a sculpted look. The first step is to prepare your skin with a clean, moisturized face. Begin by applying a primer to create a smooth base for your makeup. This allows the foundation to adhere better and helps in achieving an even finish.
Once your base is set, choose a foundation that matches your skin tone and apply it evenly across your face using a makeup sponge or brush. Following the foundation application, it’s time to introduce your light and dark shades, typically in the form of cream or powder formulas. The essence of easy contouring lies in knowing where to place these products. Use a lighter shade on the high points of your face—such as the cheekbones, bridge of the nose, and brow bones—to create dimension.
Next, apply the darker contour product in areas you wish to sculpt, such as the hollows of your cheeks, along your jawline, and on the sides of your nose. A makeup contouring step by step approach involves using small amounts of the product, building it up as needed. Make sure to step back and assess your work, ensuring that the contour lines are not too stark. Blend, blend, and blend some more to achieve a seamless transition between the light and dark shades.
For contour blending, use a clean makeup sponge or a brush designed for this purpose, working in circular motions or soft strokes. This technique can help maintain a natural appearance, which is crucial for any contour makeup guide. Don’t forget to set your makeup with a translucent powder or a setting spray for longevity. It’s advisable to explore and experiment with different products to discover the best contour products that work for your skin type. Keeping these contouring tips for beginners in mind will enhance your skills and confidence in makeup application.
Contouring for Different Face Shapes
Contouring is an art that varies significantly depending on the unique shapes of our faces. Understanding the fundamentals of how to contour for different face shapes is essential for beginners looking to enhance their natural beauty. This guide emphasizes tailored strategies designed to sculpt various face types effectively using contour makeup.
For those with an oval face shape, the goal is to maintain the harmonious proportions. Begin by applying contour along the sides of the forehead and then tapering down the sides of the face. Highlight the center of the forehead, under the eyes, and on the chin to maintain a balanced look. This easy contouring technique accentuates the length without making the face appear gaunt.
Individuals with a round face shape can create the illusion of more definition by applying the contour in a crescent shape along the sides of the forehead and near the jawline. This method elongates the face visually. A face contour tutorial would advise emphasizing the cheekbones by placing highlighter on the upper cheek area to draw the eye upward.
A square face shape benefits from softening the strong jawline. Contour makeup guide recommends applying contour along the jaw and temples, blending outward. Use a highlighter on the forehead’s center and along the cheekbones to enhance the natural angles without making them harsh.
For heart-shaped faces, the focus should be on softening a wider forehead while accentuating the chin. Apply contour to the forehead’s edges and below the cheekbones, emphasizing the chin for added balance. The best contour products for this shape include those that allow for smooth blending to achieve a seamless transition between the highlights and shadows.
In essence, understanding contouring tips for beginners that cater to specific face shapes can elevate one’s makeup game. Each face shape requires specific techniques that enhance unique features, helping individuals achieve a sculpted yet natural appearance. By following this makeup contouring step by step approach, anyone can utilize these strategies to master the art of contouring.
Highlighting: The Perfect Balance to Contouring
Highlighting plays an essential role in the contouring process, as it adds luminosity to areas of the face that you want to stand out. While contouring creates shadows to define facial structure, highlighting illuminates specific regions, resulting in a balanced and sculpted appearance. For beginners, understanding how to incorporate highlighter into their makeup routine is crucial. A well-executed face contour tutorial emphasizes the interplay between these two techniques, ensuring that one complements the other.
When applying highlight, focus on areas such as the cheekbones, brow bones, the bridge of the nose, and the cupid’s bow. These zones are naturally raised and catch light, making them perfect candidates for added brightness. A common mistake is to over-apply highlighter, which can lead to a shiny or unnatural look. Instead, opt for a subtle glow that enhances your features without overwhelming them. Using a light, tapping motion with your fingers or a makeup brush can help achieve a more seamless finish.
To achieve the best results, selecting the right highlighter product is as important as applying it effectively. Liquid highlighters offer a dewy finish, while powder highlighters can deliver a more pronounced shimmer. For a beginner-friendly experience, look for easy contouring kits that include complementary highlighter shades so that coordinating with your contour makeup becomes effortless. Additionally, utilizing contouring tips for beginners often includes recommendations for highlighters that work harmoniously with typical contour shades.
As you practice makeup contouring step by step, remember that mastery comes with time. Experimenting with various highlighter formulations will allow you to discover what works best with your skin tone and contour routine. By striking the perfect balance between highlighting and contouring, you’ll create a radiant and sculpted complexion that enhances your natural beauty.
Common Contouring Mistakes to Avoid
Contouring for beginners can be an exciting yet daunting task. Many individuals dive into the realm of contour makeup with enthusiasm, only to discover they have inadvertently made some common mistakes. One prevalent error is over-application of product. It is easy to go overboard when applying contour; however, this can lead to a heavy, unnatural appearance. Beginners should start with a small amount of product and gradually build up as required, ensuring they achieve a subtle sculpting effect.
Another frequent issue arises from improper blending. The goal of makeup contouring step by step is to create seamless transitions between shades. Beginners may use the wrong tools, such as stiff brushes or sponges, which can lead to harsh lines. Instead, it’s essential to utilize makeup brushes suited for blending, applying a light hand and circular motions to diffuse the contour. This approach creates a smooth, natural finish.
Choosing the wrong shades can also detract from the desired outcome. Beginners often select contour products that are too dark or too warm for their skin tone, resulting in an unflattering look. It’s crucial to select a contour shade that is a few shades darker than the natural skin tone and to consider the undertones. Many brands offer contour kits with a variety of shades tailored for different complexions, making it easier to find the perfect match.
Lastly, neglecting key facial features can hinder a contouring attempt. Each face shape possesses unique characteristics, and it’s essential to tailor the contour makeup guide accordingly. Beginners should familiarize themselves with their facial structure and emphasize the features they wish to highlight. By recognizing these common pitfalls and understanding how to contour effectively, beginners will be better prepared to master the art of contouring while achieving a polished and professional look.
Finishing Touches: Setting Your Contour
Once you have achieved the desired sculpting effect through makeup contouring step by step, it is crucial to set your contour to ensure longevity throughout the day. This is where setting powders and sprays come into play, playing an important role in locking in your hard work. For contouring for beginners, selecting the right products is essential.
Starting with a setting powder, it’s best to use a translucent formula. This helps to avoid altering the colors of your contour makeup while providing a matte finish. Using a fluffy brush, gently apply the powder to the areas where you have applied the contour and highlight. Focus on your cheekbones, jawline, and forehead to create a soft finish that won’t appear cakey. Ensure that the product adheres well without eliminating the definition achieved in your face contour tutorial.
In addition to powders, setting sprays are another fantastic option for ensuring your contour remains in place. After finishing all your makeup application, a fine mist of setting spray can enhance the durability of your look. For the best results, choose a setting spray designed for long wear; these can especially be beneficial during hot weather or humid conditions. When applying, hold the bottle at a reasonable distance from your face and spray in an “X” and “T” motion for even application.
For touch-ups throughout the day, consider carrying a compact version of your contour products. A mini contour kit can be invaluable for quickly and easily redefining your look. Additionally, remember that while touch-ups are helpful, less is more to avoid an overly layered appearance. Keeping these finishing touches in mind will enable you to maintain a fresh and sculpted look from morning to night.
Conclusion: Embrace Your Contoured Look
Contouring can initially appear daunting, especially for beginners. However, this contour makeup guide has equipped you with the necessary tools and techniques to start your journey toward achieving the perfect sculpted look. By following the makeup contouring step by step instructions, you can enhance your natural features and create a more defined appearance. Remember the essential contouring tips for beginners: practice frequently, work with the right products, and be patient with yourself as you hone your skills.
The best contour products are designed to complement various skin types and tones. Selecting the right shades is crucial, as it can either elevate or undermine your final look. Remember, contouring is not just about shadows; it’s about highlighting your unique beauty traits and finding the right balance. As you practice, you’ll learn how to tailor techniques to suit your face shape and personal style.
Another essential aspect is understanding that there is no one-size-fits-all approach to contouring. Everyone possesses distinct facial structures, so the face contour tutorial should be adjusted according to individual needs. Whether you’re looking for subtle enhancements or more dramatic sculpting, feel free to experiment until you find techniques that resonate with you.
Incorporate easy contouring techniques into your routine, and don’t hesitate to seek inspiration from experienced makeup artists or online tutorials. Remember, the key to mastering the art of contouring lies in consistent practice and experimentation. So, go ahead, embrace your contoured look! We invite you to share your experiences, successes, or any questions you might have about contouring for beginners. Your journey can inspire others to explore the captivating world of makeup. Happy contouring!


It was helpful for me. Thanks a lot.